Configuring DHCP with Dnsmasq
Let’s look at how it can be used as a DHCP server. A DHCP server is usually set up on a machine or a device that has a static IP address configured to the network interface which is being used to serve the DHCP queries. That interface is then connected to the physical network that you want to configure it through DHCP, which can have any number of machines on it. In real life, the DHCP server and the DHCP client usually run on two separate machines.
In this machine we have an interface called eth_srv. Let’s configure it to be the DHCP servers interface.
 This command shows us that this interface has the 192.168.1.1 IP address. The /24 part indicates that this IP is in a network that goes from 192.168.1.0 to 192.168.1.255.
We also have an interface called eth_cli, which is the interface that we’ll use to simulate a client requesting an address using DHCP. This interface doesn’t have an IP configured yet.
So I’m going to type in IP ip address show eth_cli
 We can see that this interface doesn’t have an IPV4 address configured.
We’ll change this by using our DHCP server. To do this, we need to provide additional configuration to dnsmasq.
We can see that this interface doesn’t have an IPV4 address configured.
We’ll change this by using our DHCP server. To do this, we need to provide additional configuration to dnsmasq.
Let’s look at the configuration file. I’m going to type in cat dhcp.config
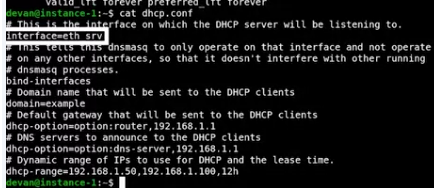 The interface option tells dnsmasq that it should listen for DHCP queries on the eth_srv interface.
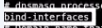 The bind interfaces option tells it not to listen on any other interfaces for any queries. This allows us to have more than one dnsmasq server running at the same time, each on its own interface.
 The domain option tells the clients the networks domain name and will be used for querying host names.
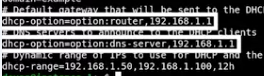 Then we have two different DHCP options, which are additional information that will be transmitted to DHCP clients when the IP is assigned
 Finally, we configure the DHCP range. This is the range of IP addresses that the DHCP server can hand out. The last value in the DHCP range line is the length of the lease time for the IP address. In this case, it’s 12 hours, which means that once an address is assigned to a machine, it will be reserved for that machine for those 12 hours. If the lease expires without the client renewing it, the address can be assigned to a different machine.
Let’s tell dnsmasq to start listening for queries using this config. Now I’m going to type in sudo dnsmasq -d -q -c dhcp.conf and then hit “Enter.”
 We can see in the output that dnsmasq is listening for DHCP queries on the eth_srv interface with the options that we set in our configuration file.

Now, let’s run a DHCP client on a second terminal. I’m going to open up the second terminal. Now, my second terminal, I’m going to type in sudo dhclient -i eth_cli, and then -v for verbose
Now, let’s run a DHCP client on a second terminal. I’m going to open up the second terminal. Now, my second terminal, I’m going to type in sudo dhclient -i eth_cli, and then -v for verbose
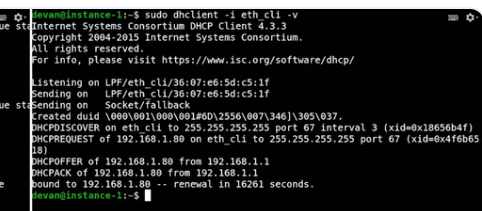 We’re telling it to run on the eth_cli interface and we’re using the -v flag to see the full output of what’s happening. Here we see the packets being exchanged and how our client got the IP address 192.168.1.80. We also see that the DHCP client expects to renew the address before it expires.
Let’s see how our interface looks now. Now I’m going to type in ip address show eth_cli
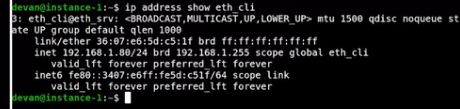 Our eth_cli interface has successfully acquired an IP address. Now, let’s look at what dnsmasq printed when the request was made.
We see the same packet exchange that we saw from the client.
 But dnsmasq also shows that it now knows the hostname of the machine with the address 192.168.1.80 because dnsmasq also has DNS capabilities. This means it will also provide this as an authoritative answer for local queries
Now I’m going to type in dig @localhost instance-1.example
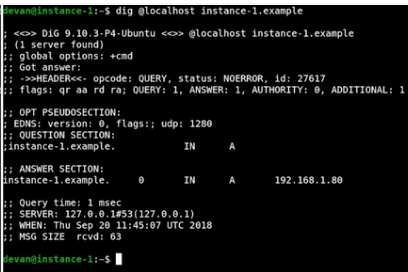 With that, we’ve seen how dnsmasq can act not only as DNS server, but also as a DHCP server.
As mentioned earlier, in real life, you would have this on separate machines, physical or virtual. If you want to test a setup like this, you’d normally do that on a separate network from the production network.
Remember, never test in production