Windows - Disk Partitioning and Formatting a Filesystem
Disk Management utility: Native tool for Windows that helps with managing disk space
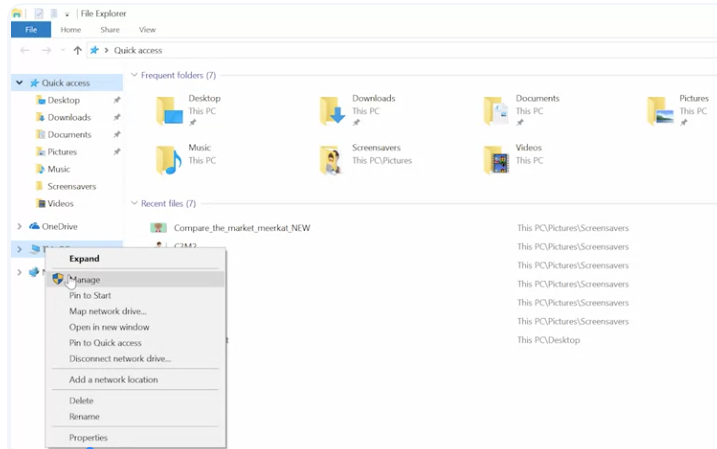
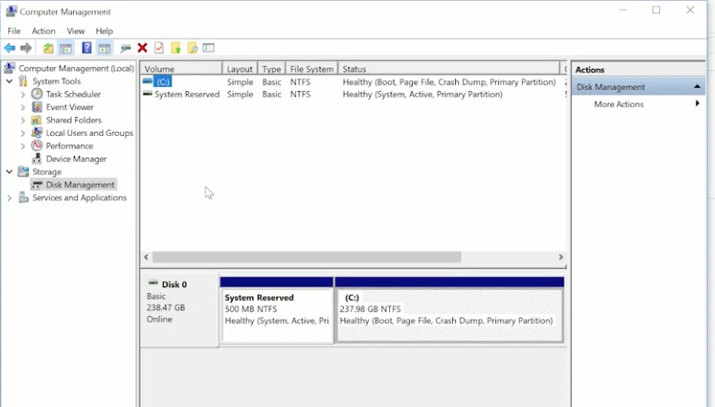 We should see a display of both the disks and disk partitions, along with information about what type of file system they’re formatted with.
One super cool property of the disk management console is that from here, you can also make modifications to the disk and partitions on your computer.
We should see a display of both the disks and disk partitions, along with information about what type of file system they’re formatted with.
One super cool property of the disk management console is that from here, you can also make modifications to the disk and partitions on your computer.
Messing with the partition where the Windows operating system is installed probably isn’t the best way to demonstrate the partitioning and formatting abilities of the disk management console. Let’s use a USB drive instead.
Once the drive has been inserted and the plug-and-play service does the work of installing the driver for it, you should see it show up in the disk management as an additional disk.
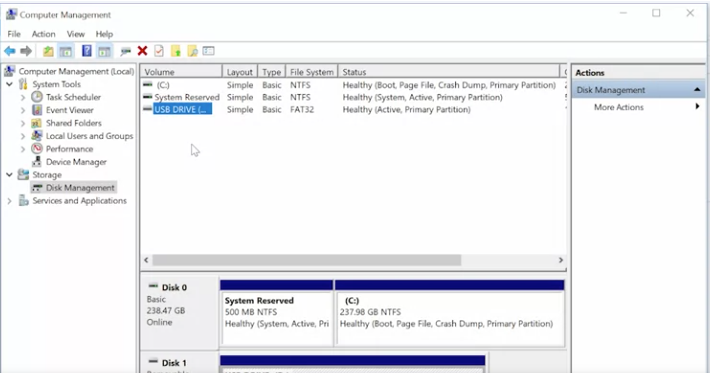 The USB drive is currently formatted using the FAT32 file system. Let’s go ahead and reformat that partition using NTFS instead. To do this, we right-click on the partition and choose “Format”.
 From this window, we can choose the volume label or name we’d like to give the disk.
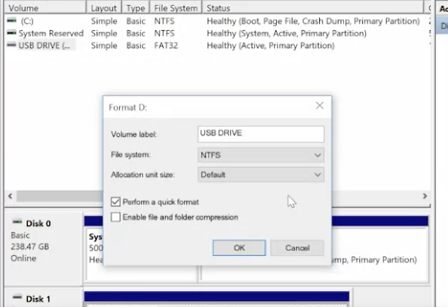 the allocation unit size is the block size that will be used when you format the partition in NTFS,
- in other words, this is the size of the chunks that the partition will be chopped into. Data that needs to be saved will spread out across those chunks.
- This means that if you store lots of small files, you’ll waste less space with small block sizes. The difference between a quick format and a full format is that in a full format, Windows will do a little extra work to scan the disk or a USB drive, in our case, for errors or bad sectors
If you enable compression, your files and folders will take up less space on the disk, but compressed files will need to be expanded when you open them, which means the computer’s processor will need to do some extra work. We are particularly concerned with squeezing out every last bit of disk space, so we’ll leave this box unchecked.
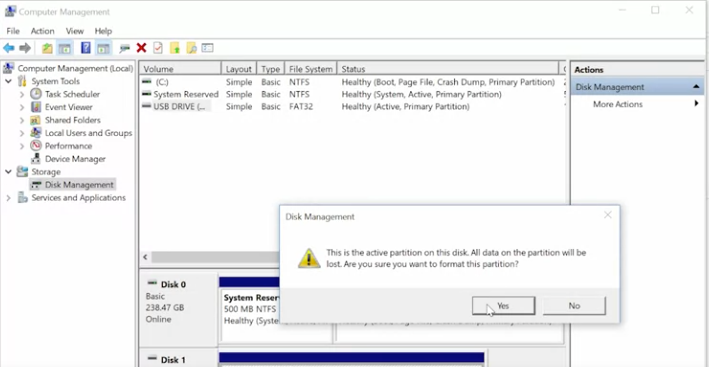
Windows will warn us first that formatting the volume will erase any data that might be on it. Once we let it know that it’s okay, it’ll start the formatting process. After a little bit of processing, we should see the label on the partition turn to healthy.

To do disk manipulation from the CLI, we’ll dive into a tool called diskpart. Diskpart is a terminal-based tool built for managing disks right from the command line. Let’s format our thumb drive again, but using diskpart instead of the GUI.
First, we’ll plug in our thumb drive. Then to launch diskpart, all we need to do is open up a command prompt, in this case, command.exe and type diskpart into it.
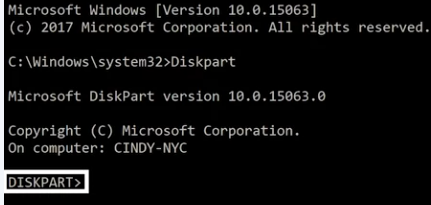 This will open up another terminal window where the prompt should read diskpart.
You can list the current disks on the system by typing list disk.
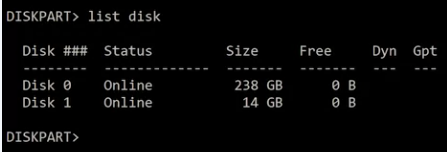 Next, we identify the disk we want to format. A good signal is the size of the disk, which will be much smaller for our USB drive. Then we can select it with select disk and then disk 1.
 Then we can select it with select disk and then disk 1.
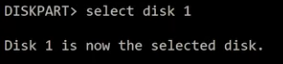 Now, we’ll wipe the disk using the clean command, which will remove any and all partition or volume formatting from the disk.
 With the disk wiped, we now need to create a partition in it. This can be done with the create partition primary command, which will create a blank partition for our file system
 Then, let’s select the partition with select partition 1; that’s the number of our freshly created partition.
 Now, we’ll mark it as active by simply typing active
 The next step is to format the disk with the NTFS file system
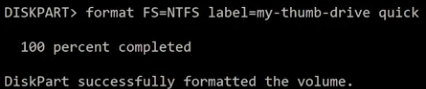
We can do this by running this command at the diskpart prompt. Format, FS for file system, NTFS, and the label, I’m just going to call it my-thumb-drive, and then the formatting type, we’ll want to make it quick
The next step is to format the disk with the NTFS file system
We can do this by running this command at the diskpart prompt. Format, FS for file system, NTFS, and the label, I’m just going to call it my-thumb-drive, and then the formatting type, we’ll want to make it quick
Disk partitioning enables more efficient management of hard disk space by breaking or “slicing” up the disk storage space into partitions. This breaking allows for each partition to be managed separately by reducing inefficient use of space.
Cluster size is the smallest division of storage possible in a drive. Cluster size is important because a file will take up the entire size of the cluster regardless of how much space it actually requires in the cluster.
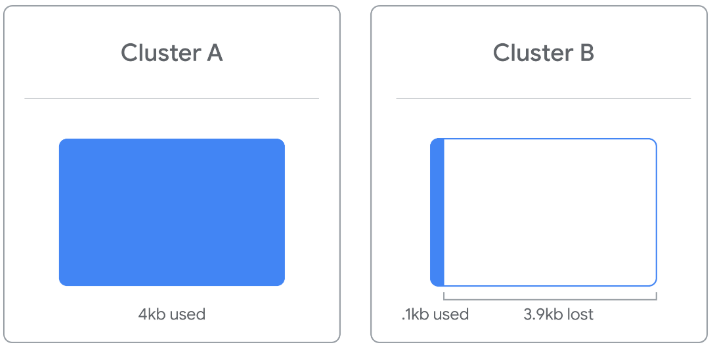 For example, if the cluster size is 4kb (the default size for many formats and sizes) and the file you’re trying to store is 4.1kb, that file will take up 2 clusters. This means that the drive has effectively lost 3.9 kb of space for use on a single file.
When partitioning a disk, you should specify the cluster size based on your file sizes. If no cluster size is specified when you format a partition, a default is selected based on the size of the partition. Using defaults can result in loss of usable storage space.