Linux - Disk Partitioning and Formatting a Filesystem
In Linux, there are a few different partitioning command line tools we can use. One that supports both mbr and gpt partitioning is the parted tool. Parted can be used in two modes: - the first is interactive, meaning were launched into a separate program like when we use the less command. - The second is command line, meaning you just run commands while still in your shell.
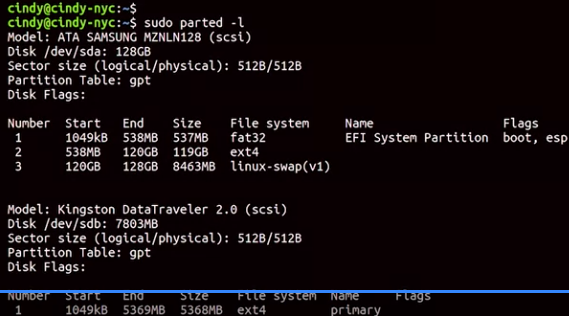
let’s run a command to show what disks are connected to the computer using the command line mode. We can do this by running the parted-l command.
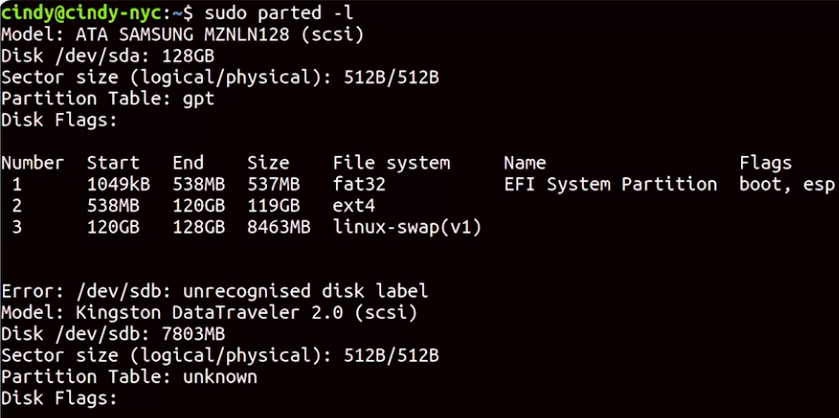 This list out the disks that are connected to our computer. We can see that the disk/dev/sda is 128GB. I’ve also plugged in a USB drive, and you can see that /dev/sdb is around 8 gigabytes.
- Here we can see the partition table is listed as gpt.
- The number field corresponds to the number of partitions on the disk
- The start field is where the partition starts on the disk.
- the field after that shows us how large the partition sizes.
- The next field, tells us what file system is on the partition.
- Then, we have the name
- finally we can see some flags that are associated with this partition
We want to be super careful that we select the correct disk when partitioning something, so we don’t accidentally partition the wrong disk. We’re going to use the interactive mode of parted by running sudo parted /dev/sdb.
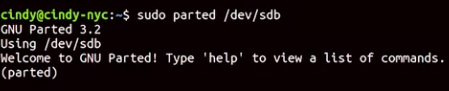 Now we’re in the parted tool. From here we can run more commands, if we want to get out of this tool and go back to the shell, then we just use the quick command. I’m going to run print, just to see this disk one more time
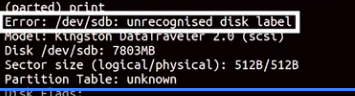 It says we have an unrecognized disc label.
We’ll need to set a disc label with the make label command, since we want to use the gpt partition table, let’s use this command, mklabel gpt.
It says we have an unrecognized disc label.
We’ll need to set a disc label with the make label command, since we want to use the gpt partition table, let’s use this command, mklabel gpt.
 Let’s look at the status of our disk again to do that, we can use a print command. Here, we can see the disk information for the selected /dev/sdb disk.
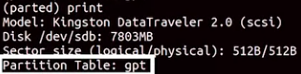 Now it says we have the partition table, gpt.
Let’s start making modifications to the disk. We want to partition the /dev/sdb disk into two partitions. Inside the parted tool we’re going to use the mkpart command.
The mkpart command needs to have the following information:
- what type of partition we want to make
- what file system we want to format
- the start of the disk
- the end of the disk.
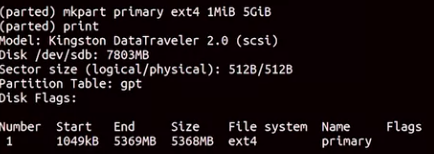 When dealing with data storage, we want to make sure we’re using the precise measurements, so we don’t waste precious storage space. Let’s opt to use mebibyte (MiB) and gibibyte (GiB) in our partition
Next we’re going to format the partition with a file system using mkfs. So I’m just going to quit, sudo mkfs- t ext4 and I want to format the partition, so sdb1
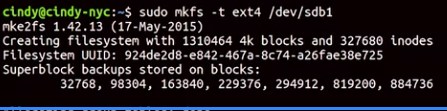 We also left the rest of the disc unpartitioned, because we’re going to use it for something else later. With that we’ve created a partition and formatted a file system on a USB drive.
Remember to always be careful when using the parted tool. It’s very powerful and if you modify the wrong disk on here, it could cause a pretty big mess.